

How to Install Bobcat Rear Window | Complete Guide
Posted by AllSkidsteers Tech Support Team on 13th Sep 2018
 Trying to install your Bobcat® rear window may appear to be a difficult task left only for the pros. But with this DIY instruction guide, we'll walk you through step by step providing some helpful Pro Tips along the way. Whether your installing a new rear window and re-using the original sealand cord, or if you purchased a complete Bobcat® skid steer rear window kit, this instruction walk through will make the replacement of your Bobcat® rear window quicker and easier. These instructions apply to all Bobcat® C, F, & G-Series Skid Steers along with either polycarbonate ( poly ) or glass back windows. Any parts needed in this installation process can be found online at AllSkidsteers.com.
Estimated Installation Time : 1 Hrs. ( approximate time only; actual time may vary. )
Needed for installation :
1. Rear Window
3. Rubber cord
4. Screw-driver or Large Curved Pick
Step 1
Before starting the install, clean the window opening in the cab with de-greaser or soapy water to remove any debris from the surface to ensure a proper seal to the cab ( figure 1).

Step 2
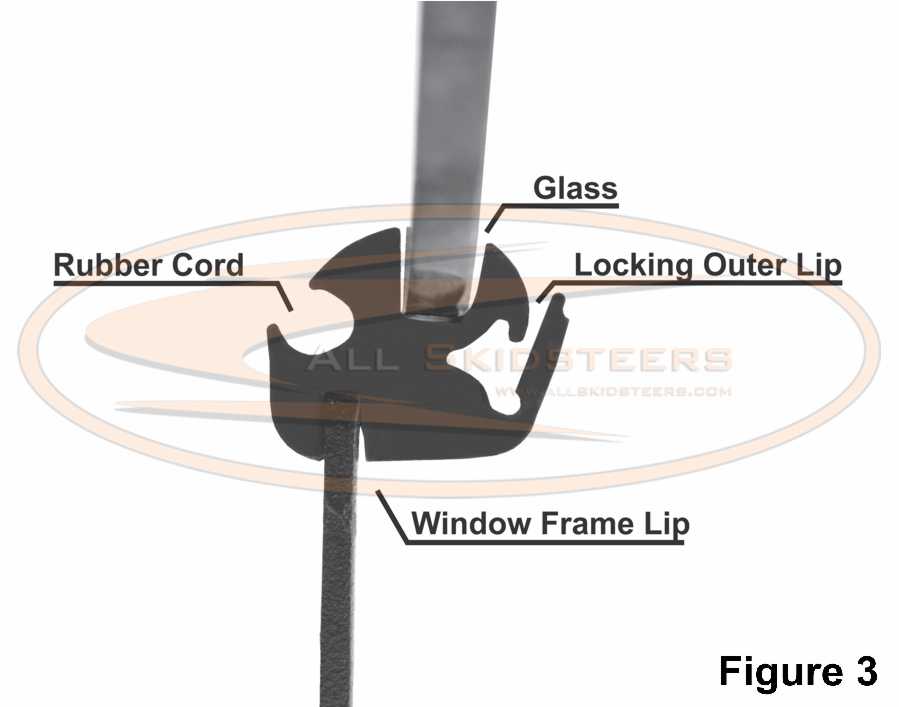
Next, starting at the lower center of the window opening ( figure 2 ), press the seal onto the window frame lip using the provided slot in the seal ( figure 3 ). Work the seal around the window opening ( paying close attention to press the seal into the corners ) until it meets back in the middle at the starting point. To be certain the seal is being installed properly, refer to the diagram below ( figure 3 ).

Step 3
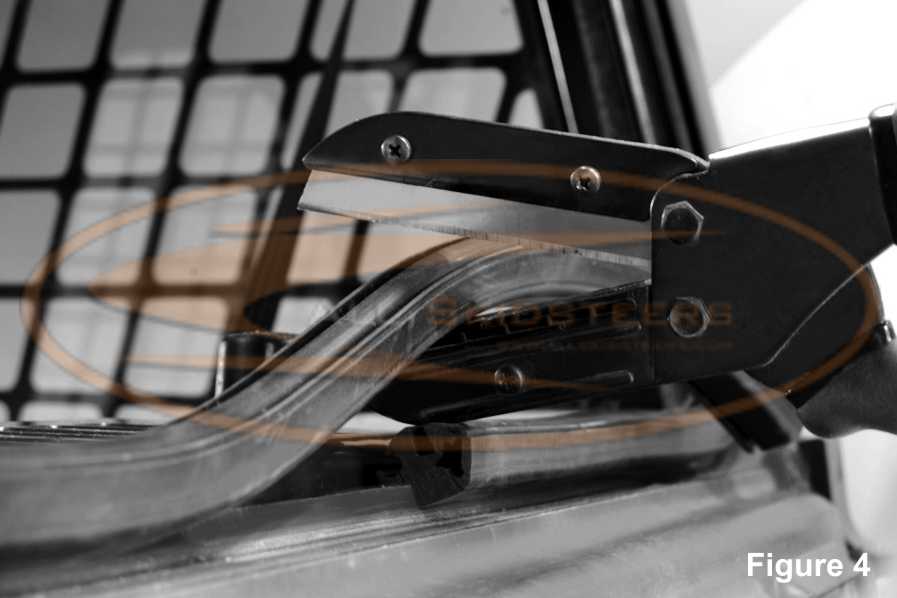
Once the window is installed, it will stretch the seal causing a gap where it meets together. To avoid this, cut the seal 0.5" to 1.0" too long ( figure 4 ) to compensate for the stretching.
Step 4
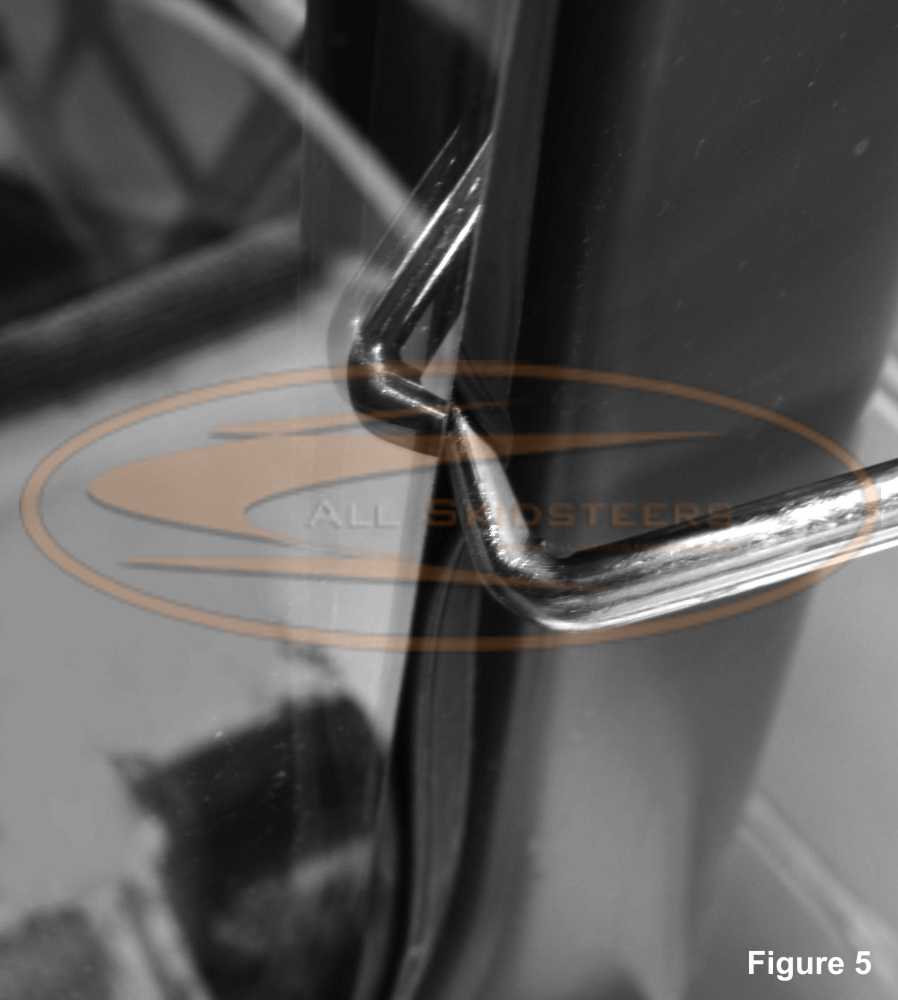
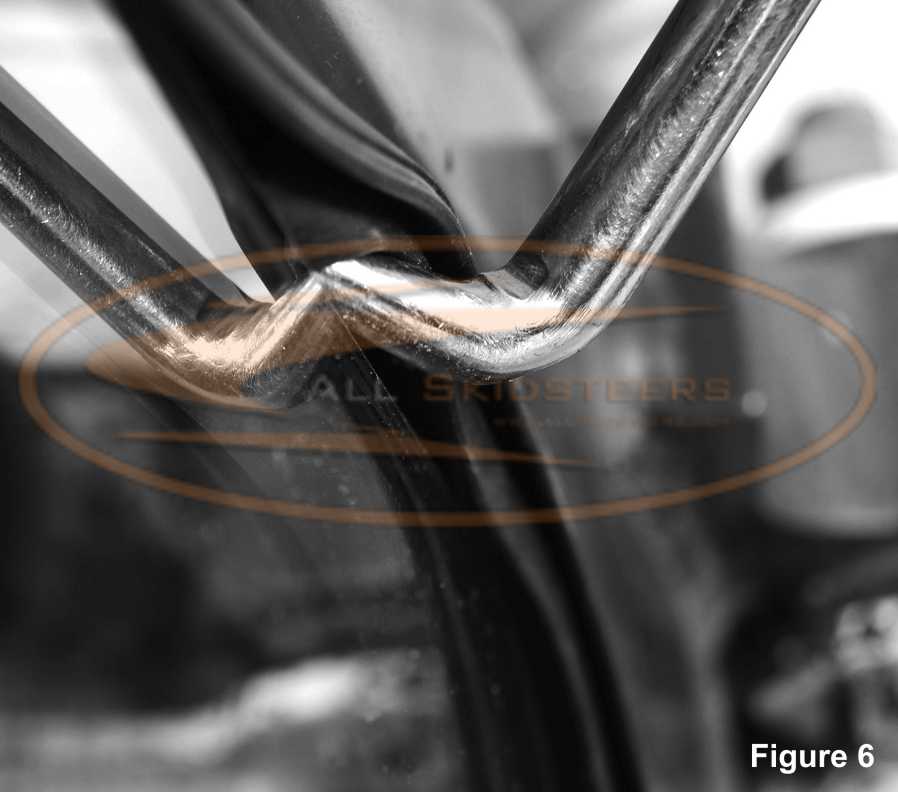
Once the seal is around the window opening, insert the lower portion of the rear window in the slot provided by the rubber seal. With the bottom of the window being held by the rubber, push gently on the top of the window causing it to move closer to the cab. As you push the window in you will see two flaps holding the glass from fitting in the glass slot. Start by using a screw-driver or a large curved pick and gently pull the first flap out from behind the glass on the right and left sides only ( figure 5). Next do the same with the second flap, only pulling it out of the way on the right and left sides of the glass ( figure 6 ). After the side flaps are out of the way, the window will mover closer into place allowing the same steps to be applied at the top of the rear window ( folding in the first flap then the second ). Once all the flaps are over the window it will snap into the glass slot portion of the window rubber. Press on the edges of the window to make sure it is securely in place.
Step 5
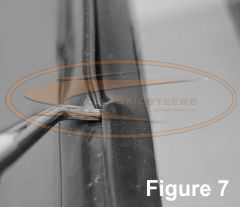
Using a screw-driver or large curved pick, start to fold the locking outer lip of the molding into the spot provided in the rubber. Start at one end and work your way around the window being careful as to not puncture the seal ( figure 7 ). This step will lock the rear window into place.
Step 6
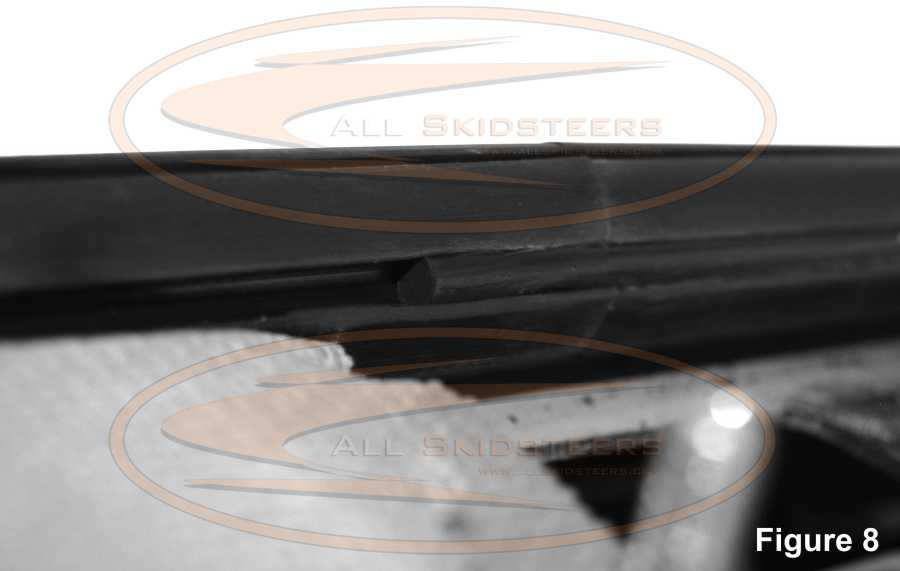
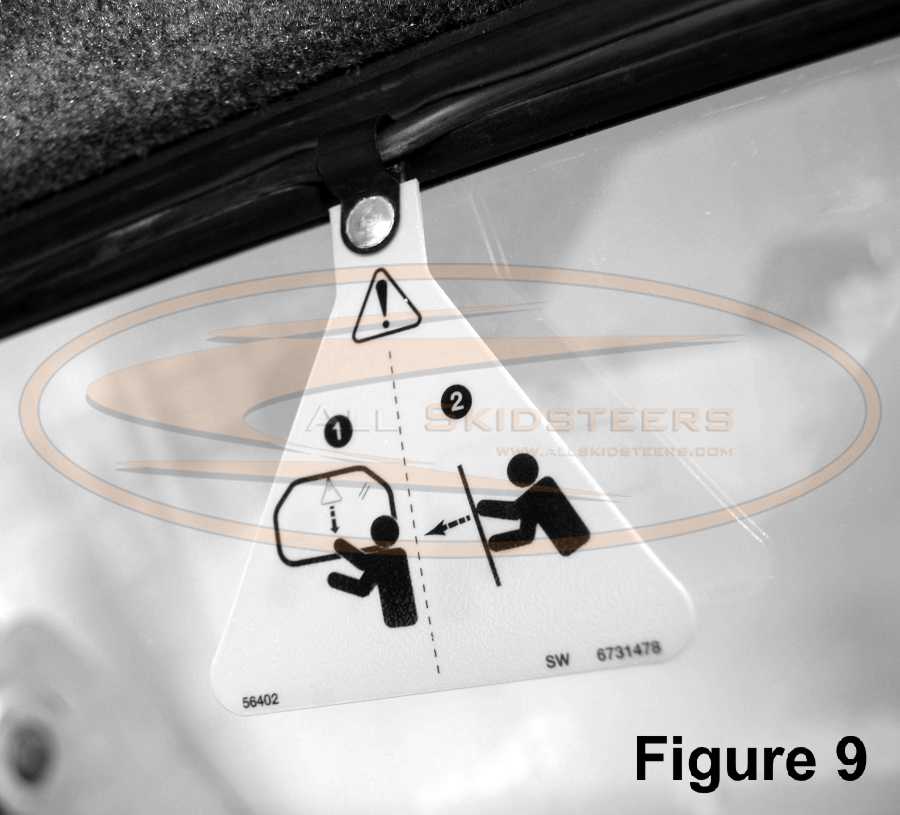
On the inside of the cab remove the inner air filter grill cover along with the filter ( if equipped ) to allow more room for the rubber cord installation. Insert the rubber cord into the spot provided in the seal with a screw-driver or a large curved pick ( figure 8 ). If you are replacing an existing rear window and have the factory emergency pull tab, stop half way at the top and slide it onto the rubber cord ( figure 9 ) then continue the rest of the installation. If you do not have a emergency pull tab, simply use a brightly colored ZipTie® and attach it to the cord on the top center of the window. When pulled, the ZipTie® or emergency pull tab will release the cord out of the groove allowing the window to be pushed out of the window frame in case a emergency exit from the machine is needed.
Step 7
After the Bobcat rear window install is complete, clean the window with glass cleaner on both the front and back. Any parts needed in installing your Bobcat rear window can be found online at AllSkidsteers.com.
Related Posts :
Install Bobcat Skid Steer Door Glass | Complete Guide ►
Bobcat® Skid Steer Parts Online Ordering ►
Related Pages :