
Skid Steer Decal / Sticker Install Guide | Pro Tips
Posted by AllSkidsteers Tech Support Team on 12th Oct 2018
AllSkidsteers' skid steer decal / stickers are made of high quality vinyl made in the USA and are designed to last through years of harsh outdoor weather. Our decals meet or exceed OEM standards. Our decals go through extensive durability and fitment tests to ensure proper fit and quality. Whether you need model number decals, skid steer back door decals, or an assortment of warning and info stickers, AllSkidsteers is your one stop for skid steer stickers and decals. In this How to Pro Tip Installation Guide you'll learn all the ins and outs of installing decals and stickers to avoid costly installation mistakes and improve the overall look of your skid steer loader.
What is the difference between a decal and a sticker?
The term decal and sticker are used relatively loosely in the skid steer parts industry as sometimes decals are called stickers and vice-versa. Here are the proper terms and the descriptions of each type according to their intended design.
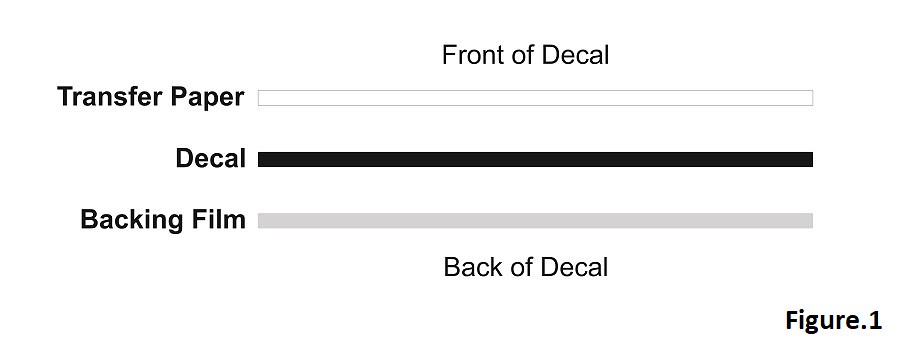
Decals: Decals consists of 3 separate layers and are cut out on vinyl sheeting( figure.1 ). Decals are used for larger and more complicated designs as they are easier to apply to the surface with the aide of the transfer paper. Layer 1 is the transfer paper, this is used for an easier installation of large decals. Layer 2 is the vinyl decal. Layer 3 is the backing paper used to protect the adhesive of the decal and to make the decal more rigid during shipment.
Stickers: Stickers consist of 2 separate layers ( figure.2 ) (sometimes containing a laminated film attached to the sticker) and printed on vinyl sheeting. Stickers don't have the extra layer of transfer paper that decals have, allowing for easier placement in small or hard to reach areas. Layer 1 is the vinyl decal, and layer 2 is the backing paper used for the same purpose as decals. These decals can be installed by using some of the following instructions supplied by this how to guide or by using a mixture of soap and water, by first spraying the mixture onto the back of the sticker with the backing paper removed. Then position the decal where desired and use a squeegee wrapped in a microfiber towel to remove the water from behind the sticker, allowing the adhesive to adhere to the surface.

How to install your skid steer decal.
Estimated Installation Time: 5 to 15 min. (approximate time only; actual time may vary depending on skill level and decal / sticker size.)
Needed for installation:
Drill with a rubber wheel attachment ( if removing old decal / sticker )
Rubber gloves ( optional )
Heat gun ( if no access to a rubber wheel )
Razor blade ( if no access to a rubber wheel )
Paper Towels
De-greaser
Tape Measure
Tape
Step 1.
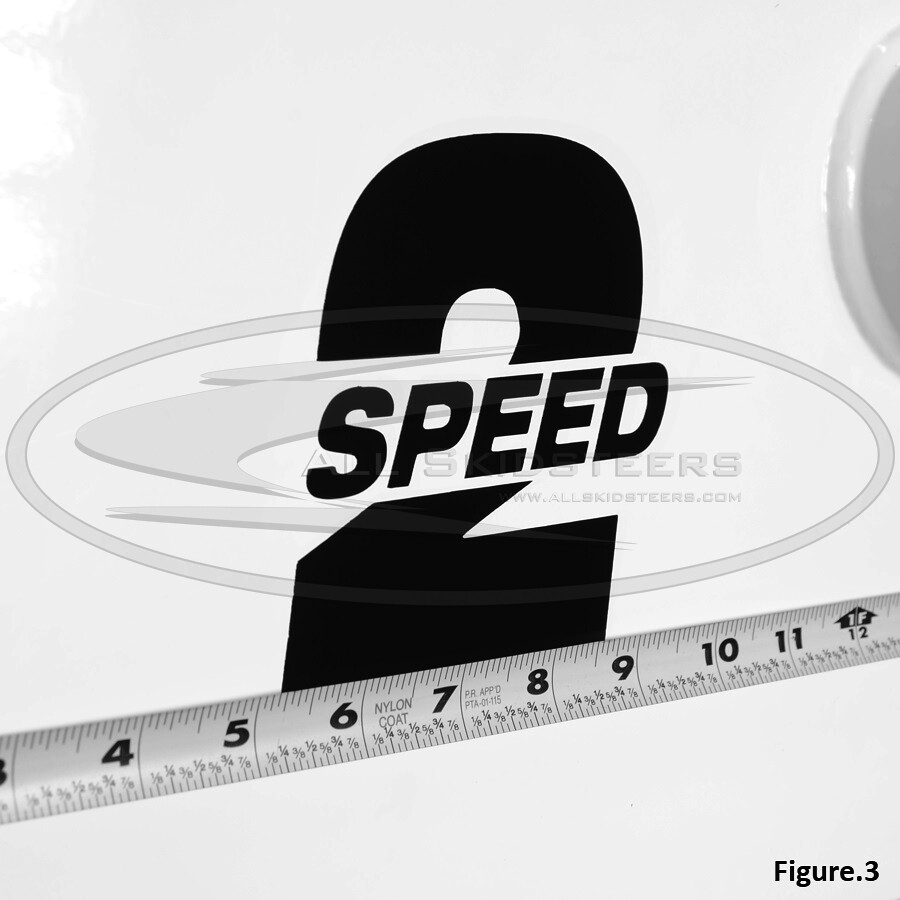
Before removing, take some measurements of the old decal by measuring the space around it to ensure the proper placement of the new decal. ( figure.3 ) If you have already removed the old decal, a measurement of the opposite side will work as well keeping in mind to label the measurements by machine location instead of sticker location. For example: on our installation of the 2-speed decal, the decal has a 5 - 5/16" space on the left side of the decal. But when we installed the decal on the right side of the machine, the spacing on the left side of the decal is 7 - 3/16". So, labeling your spacing measurements as front of machine and rear of machine help to eliminate position mistakes by keeping both the front and rear measurements unique per side.
Step 2.
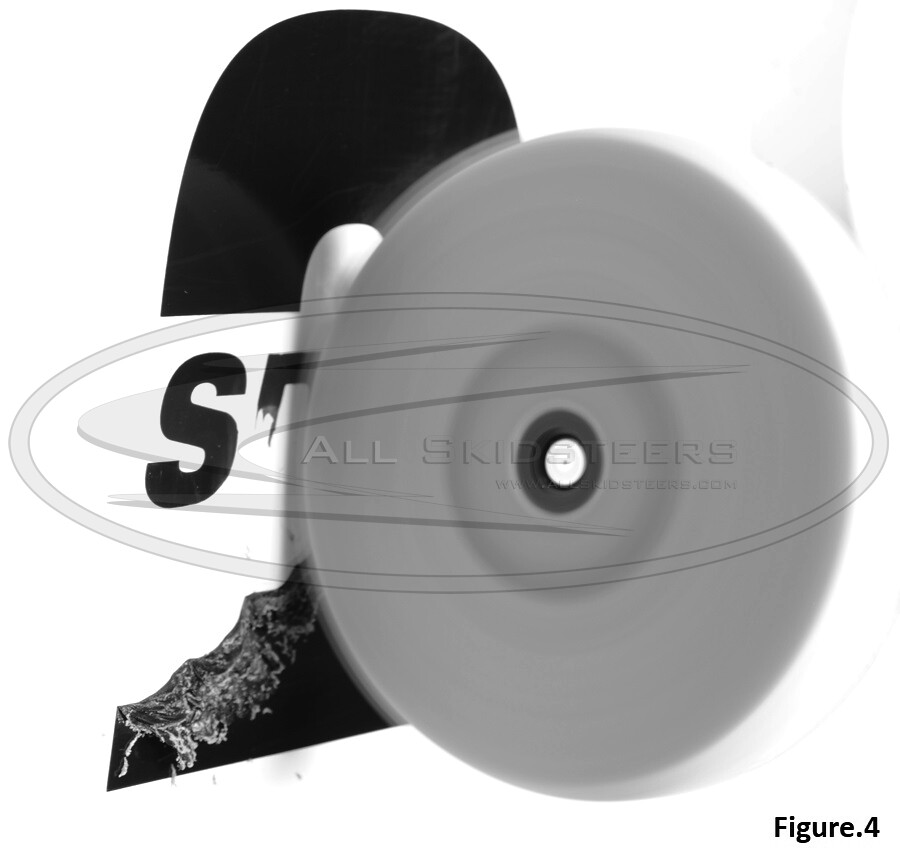
Remove the old decal by using a rubber wheel drill attachment ( figure.4 ). If you don't have access to a rubber wheel, a heat gun with a razor blade will remove the bulk of the decal. Once the bulk of the decal is removed, go over the area with a de-greaser to remove any adhesive from the machine ( figure.5 ) that the rubber wheel or razor blade didn't get off - leaving a clean working surface. At this point in the installation process, if any rust around the decal area needs repaired, now is the time do so.

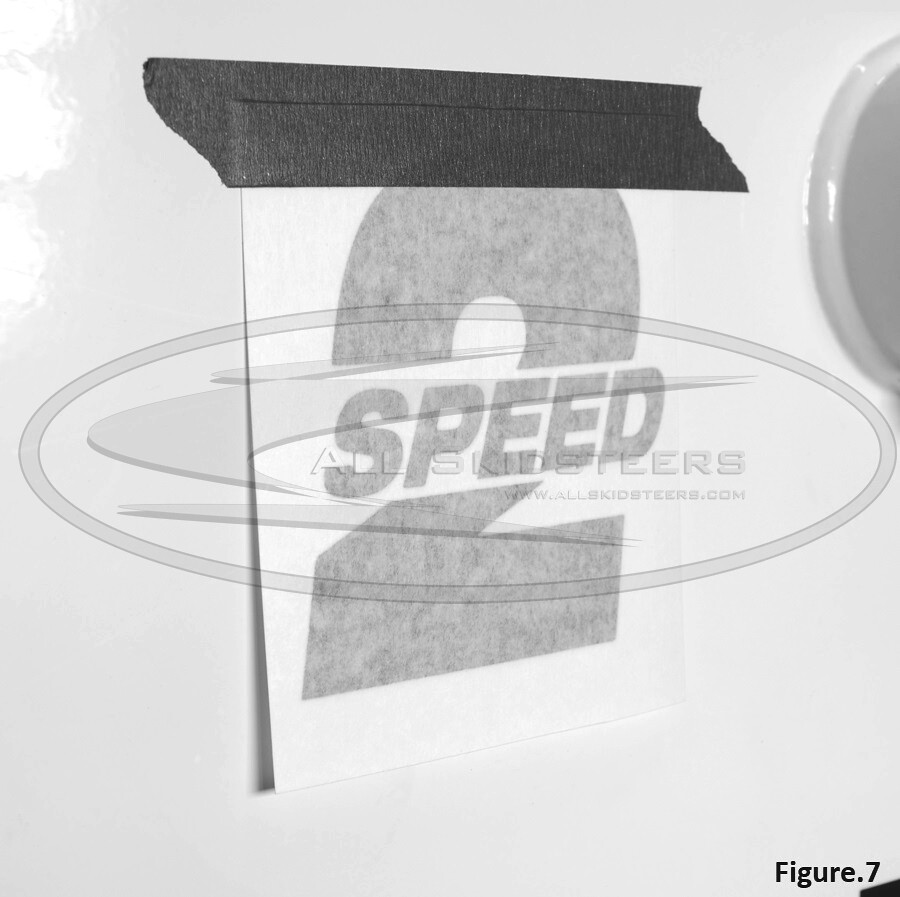
Step 3.
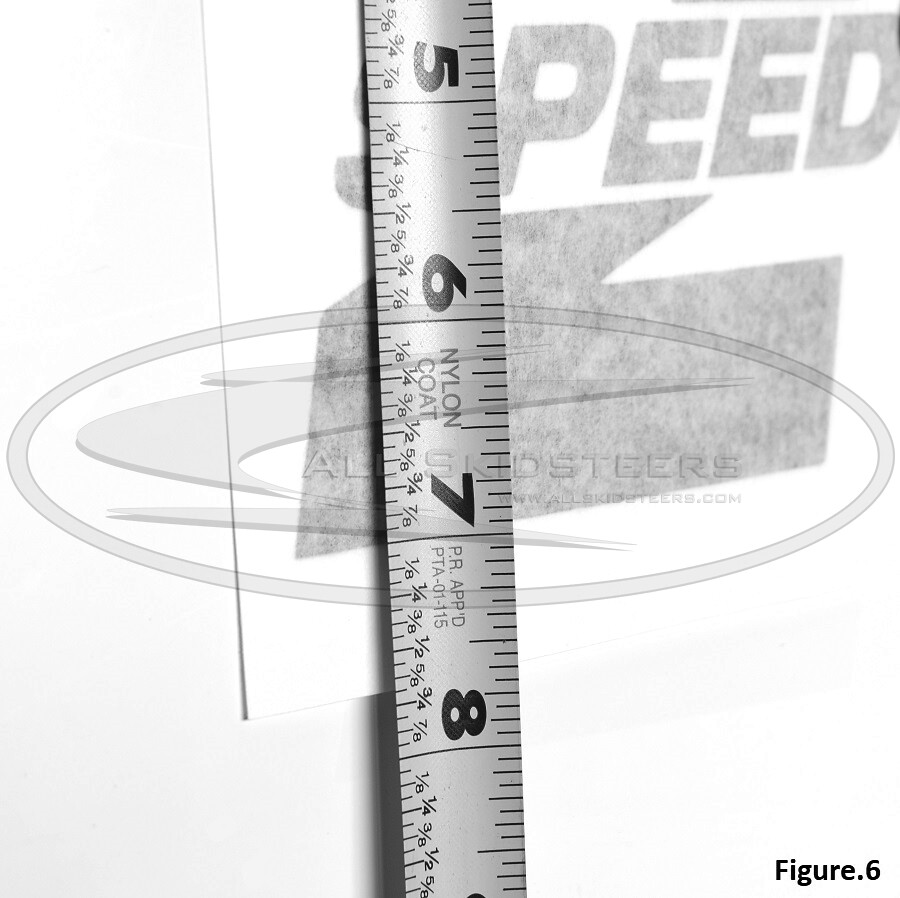
Using the measurements taken in step 1 position the decal accordingly ( figure.6 ). Once in position, use a piece of tape on top to hold the decal in place ( figure.7 ). Taping the top of the decal will keep the decal in place allowing for an easy and precise decal installation.
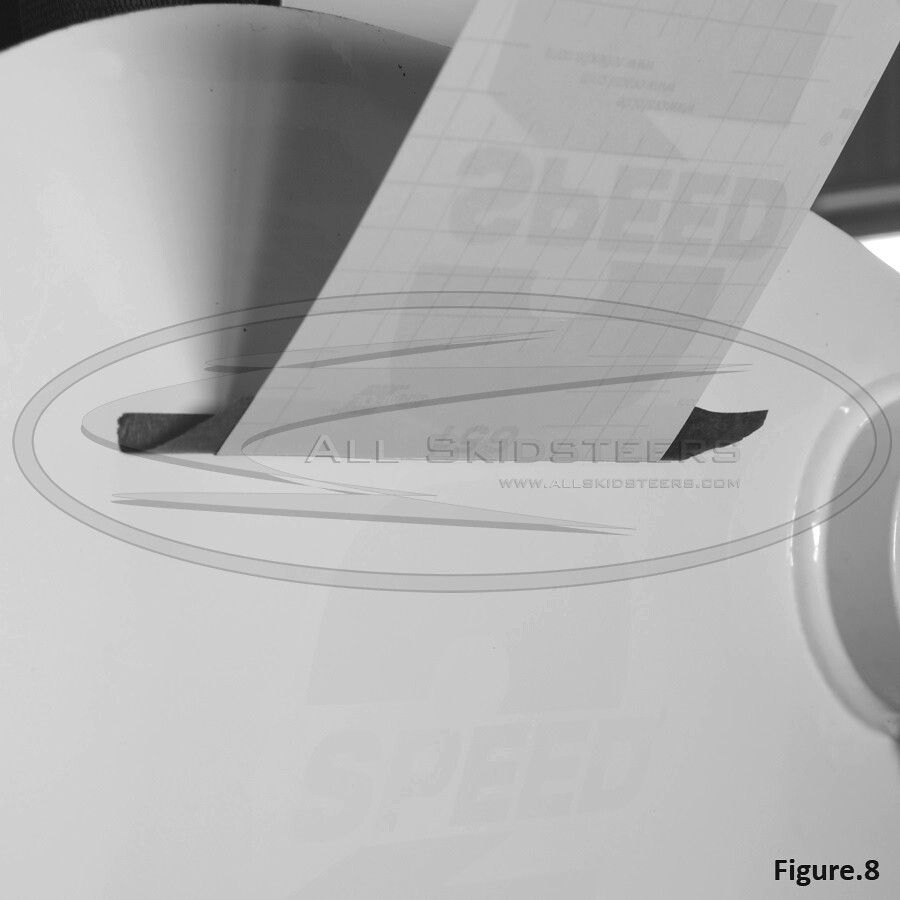
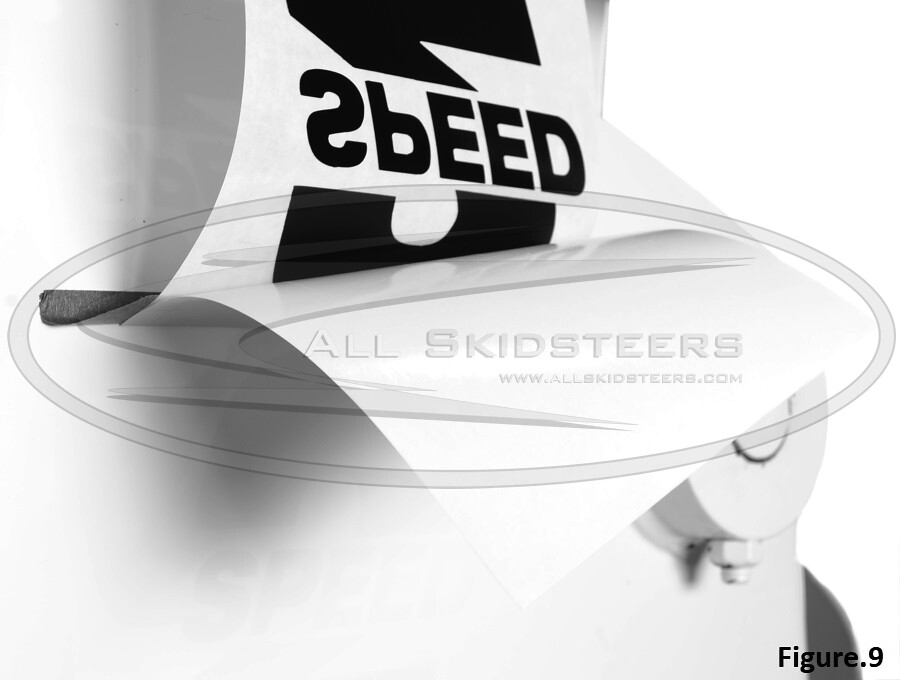
Step 4.
Using the tape as a hinge, flip the decal up exposing the backing paper of the decal. ( figure.8 ) Remove the backing paper ( figure.9 ). Do not lay the decal flat on the machine as it will adhere strongly to the surface causing bubbles, creases, and possibly tears if you try to remove it.
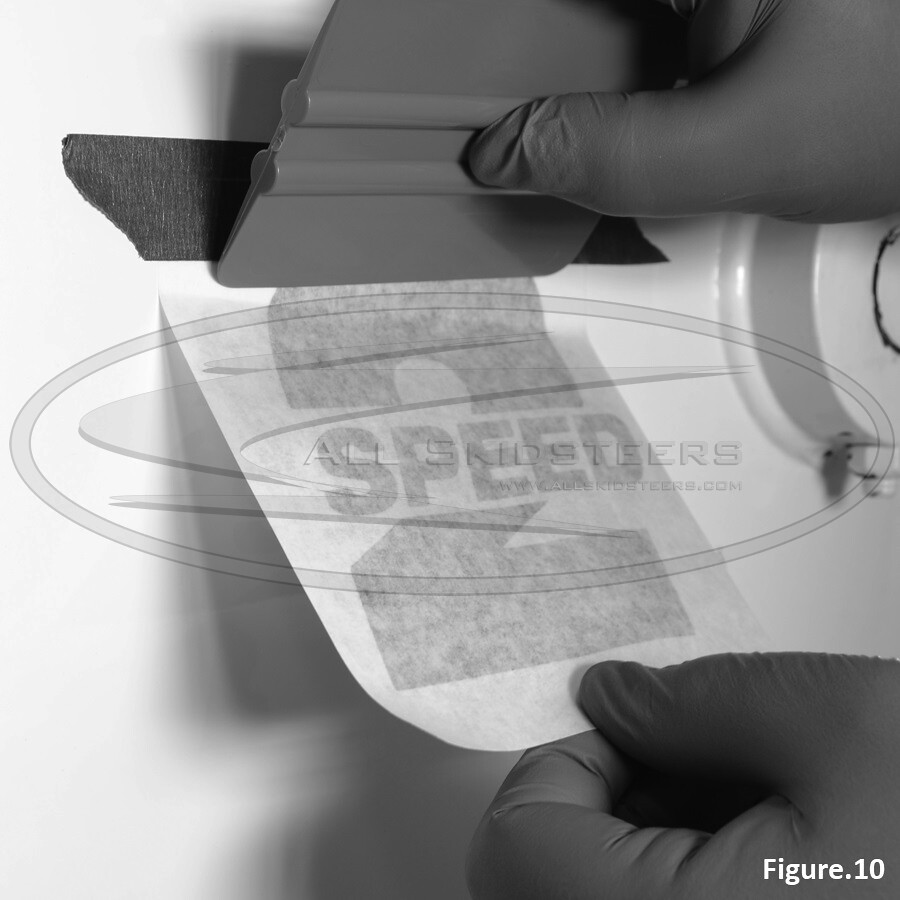
Step 5.
Start to lower the decal causing the adhesive on the top of the decal to come in contact with the machine while using the squeegee to press out any bubbles or crease ( figure.10 ). Continue to lower the decal slowly taking your time to press out any bubbles.
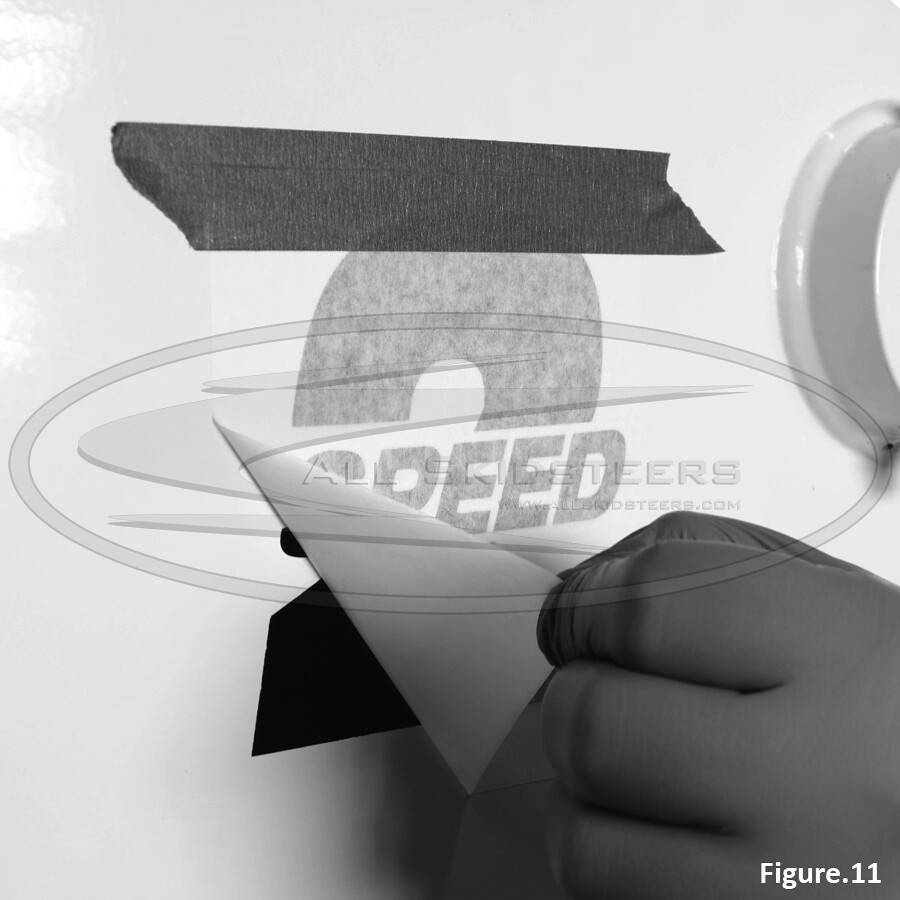
Step 6.
Peel off the front protective paper along with the tape paying close attention not to peel up the decal along with it ( figure.11 ). If any part of the decal peels up with the transfer paper, gently press the decal back in place with the squeegee. For the best results, peel up the transfer paper at a sharp angle from the surface. If your using the squeegee with the transfer paper removed from the decal, it is recommended to wrap the squeegee in a microfiber cloth to avoid making scratch marks in the decal. If once the application paper is removed and you see a bubble in the decal, use a sharp razor blade to make a very slight hole on the bubble and press it out using the squeegee wrapped in a microfiber cloth.
To purchase skid steer stickers and decals online visit our Decal & Sticker Section at AllSkidsteers.com.